v2.0.0 AI Agent DeSrc
The v2.0.0 release focuses primarily on integrating AI large-language models, implementing syntax suggestions, and adding data migration features.
Code Templates and Syntax Suggestions
Code Templates
Custom Templates
You can save frequently used scripts as templates. Here’s how:
- Right-click the script you want to save and choose [Save as Template], or click the [Save as Template] button above the editor, or use the
Alt + Tshortcut to open the template settings window. - In the popup, set a short code and click [OK] to finish the template setup.
- In the editor, type the short code to quickly activate the corresponding script template.
Example:
Built-in Templates
In addition to custom templates, the software also has 6 built-in templates:
| Short Code | Content |
|---|---|
| fetch | FETCH PROP ON player "player104" YIELD properties(vertex) |
| find | FIND SHORTEST PATH FROM "player102" TO "team204" OVER * YIELD path AS p |
| get | GET SUBGRAPH 1 STEPS FROM "player101" YIELD VERTICES AS nodes, EDGES AS relationships |
| go | GO FROM "player102" OVER serve YIELD dst(edge) |
| gos | GO 2 STEPS FROM "player102" OVER follow YIELD dst(edge) |
| match | MATCH (n)-[r]->(m) RETURN n, r, m LIMIT 25 |
If the built-in templates don’t fit your project, feel free to update them as needed.
Syntax Suggestions
In version v1.2.0, code completion supported only keywords and function names. In v2.0.0, code completion is enhanced to include broader syntax hints. Here’s a sample of the FIND PATH syntax in nGQL:
AI Agent Professional Edition
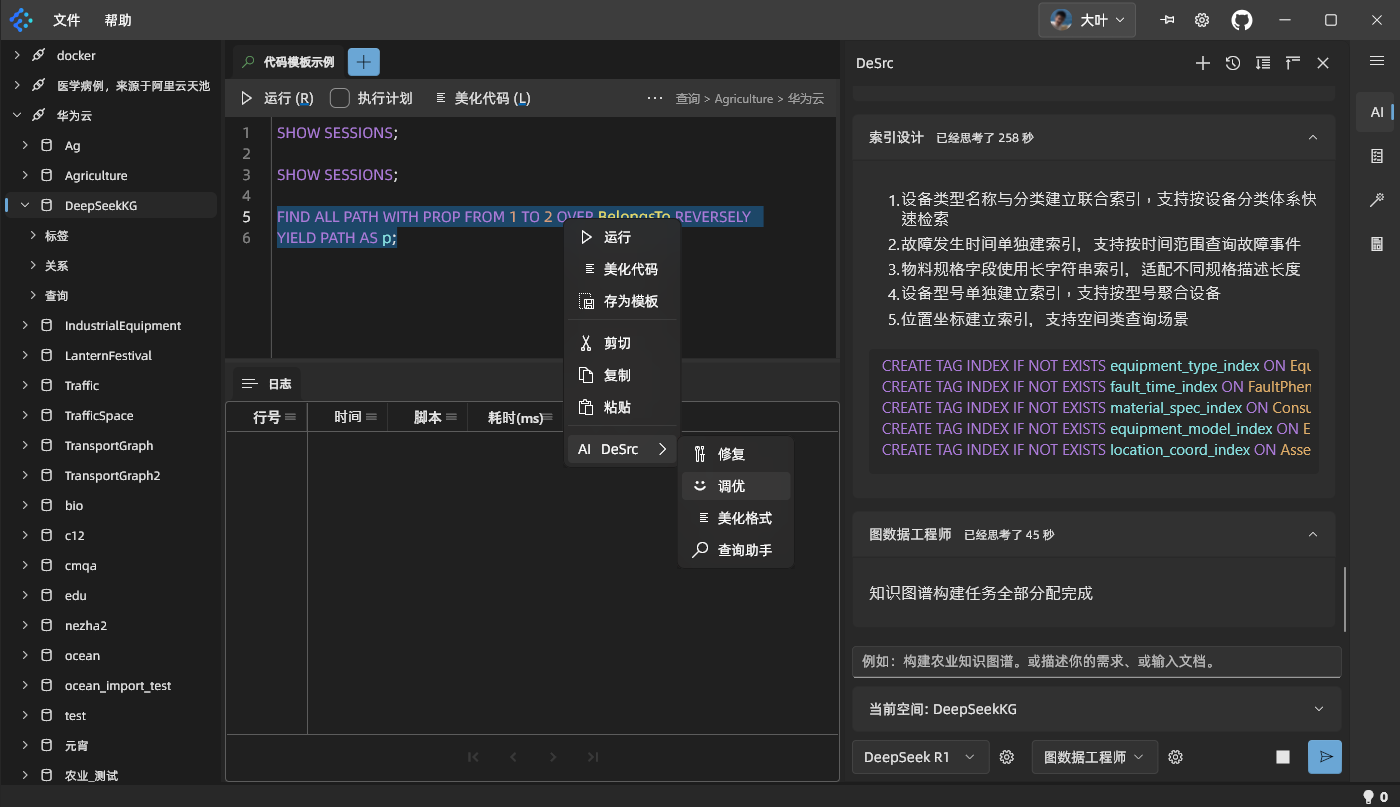
The client integrates an AI large-model system with a default DeepSeek-R1 model (and ApiKey) so you can quickly get started using AI. For example:

Or you can right-click in the query area to quickly invoke AI, as shown below:
Note
For the built-in AI model, currently we do not limit the token usage. We will renew the service on an as-needed basis. If usage becomes unavailable due to outstanding fees, please apply your own ApiKey through a large-model platform.
Possible services include:
- Alibaba Cloud Bailian
- DeepSeek Official
In practice, for scenarios with subroles, the official R1 model requires role alternation in extended multi-turn conversations. At the moment, it cannot fully handle the “AI self-assigns tasks” style conversations. It can still support multi-turn conversations without subroles.
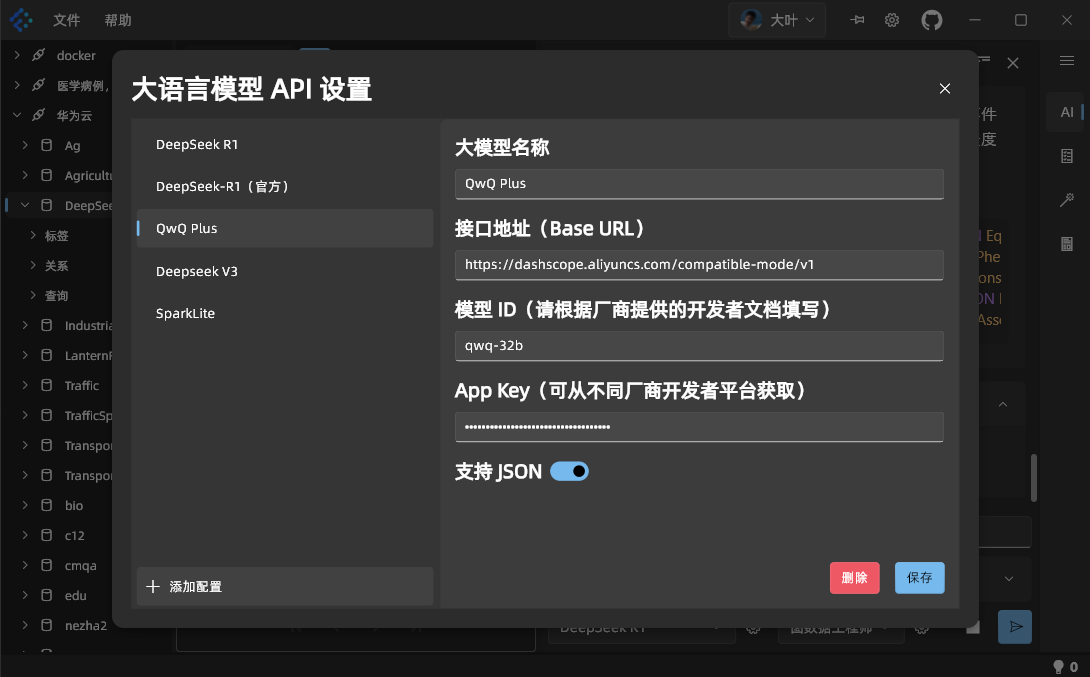
Model Configuration
From the AI tab on the right, click the gear icon after the [DeepSeek-R1] dropdown to open the model configuration window:
Eight Built-in Roles
By default, the “Graph Data Engineer” role and three others share an upstream-downstream workflow. The large model automatically switches among roles to carry out the requested task. The role list is shown below:
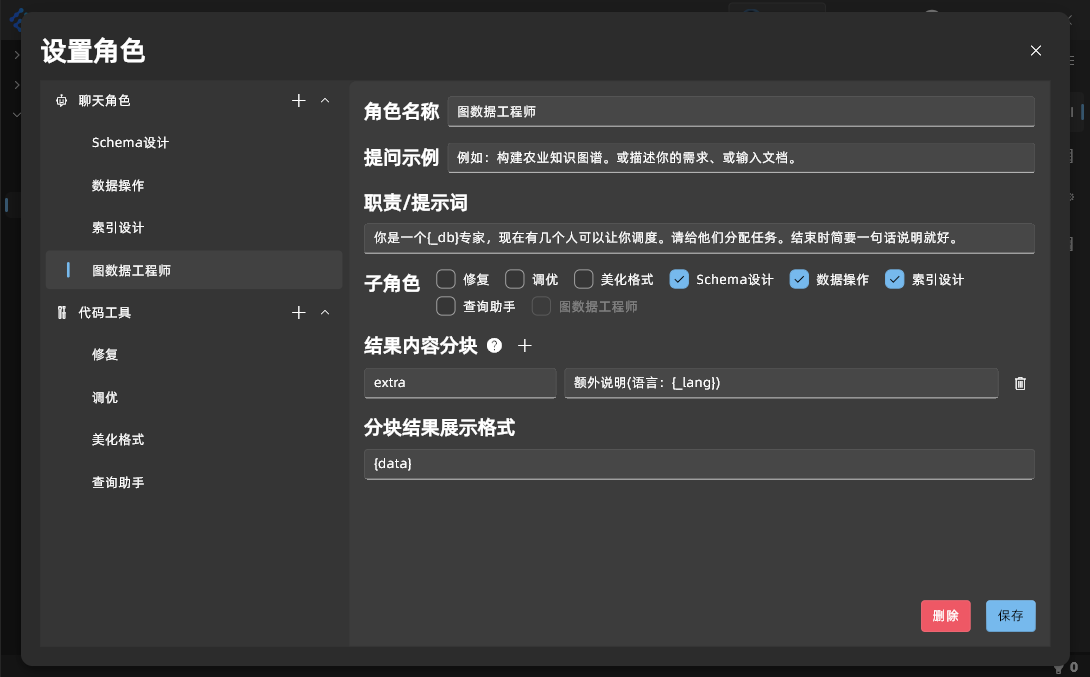
- You can edit the built-in roles.
- You can click the
+sign after a category to add a custom role. By setting different system prompts, you can switch between roles to handle various tasks. - If a role contains subroles, make sure the [Segmented Results Display Format] includes
{data}so that the content displays correctly.
Sharing Environment-Related Info with the Large Model
- Share table structures
- Share data relationships

Note
This only shares table structures, not actual data.
Also, the data mode only shares the relationship model between data, not the actual data.
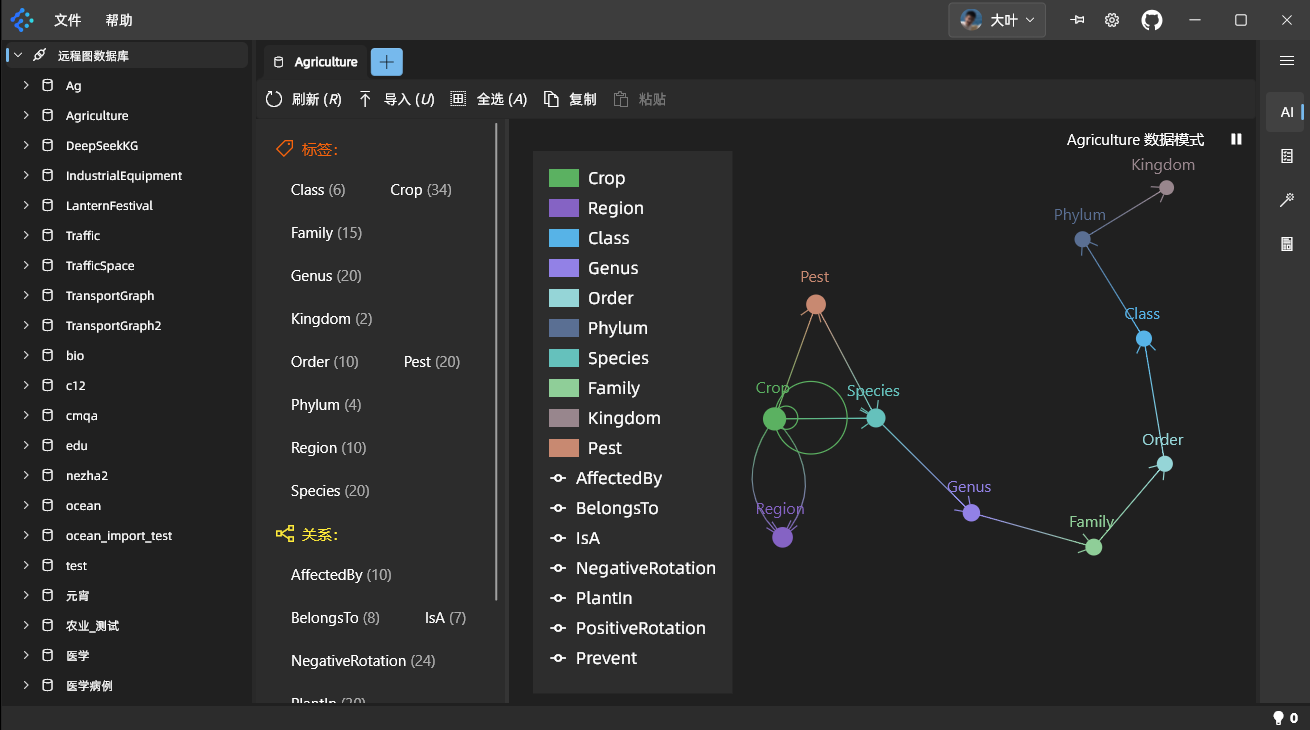
Graph Space Overview, Migration, and Backup Professional Edition
- Graph Space Data Overview
- Table Selection for Copy (partial, full, or none; default is full)
- When backing up data, indexes are also backed up, and index rebuilding is completed
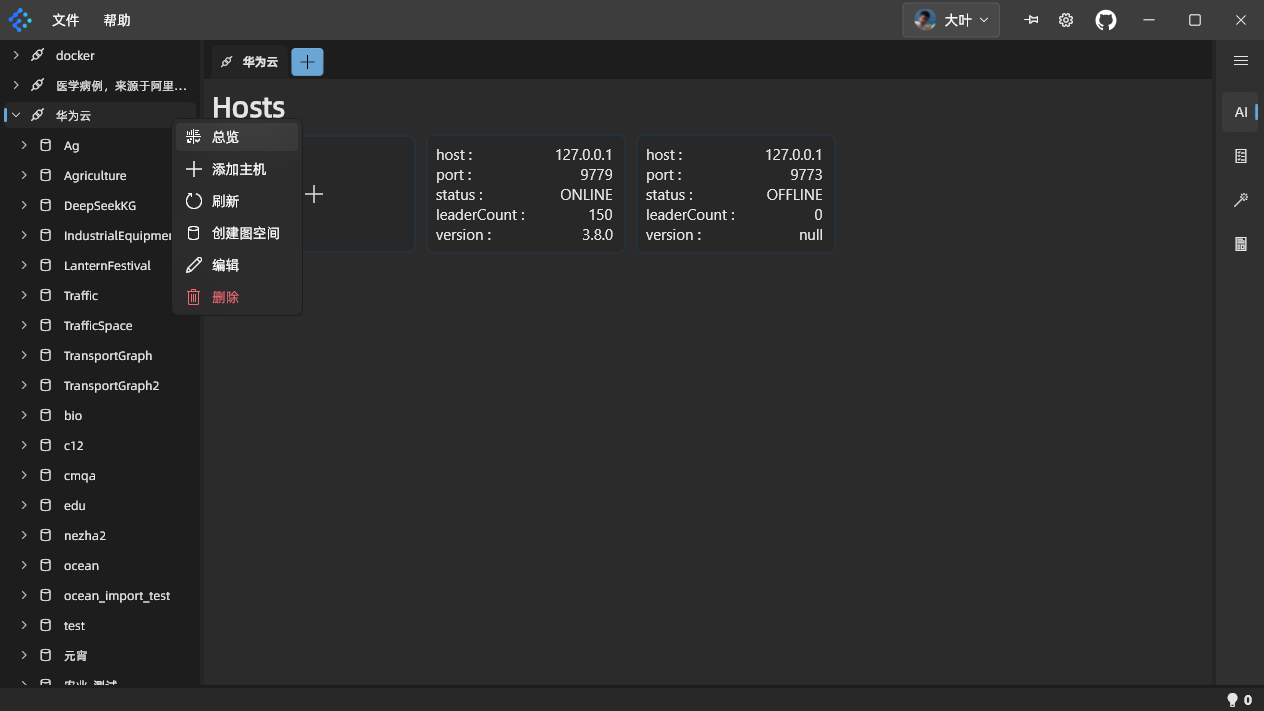
Right-click a graph space name in the navigation tree and choose [Overview] to see the current graph space’s stats and relationships:
After viewing the stats, click [Copy] at the top. In the left tree, right-click the target space, select [Overview], then click [Paste] to complete a copy of the space’s schema, data, and indexes.
By default, the system copies all data. If you only need certain data, click and drag with your mouse to select the desired Tag or Edge, or single-click to select them.
Tasks and Notifications
To further improve user experience, we’ve optimized schema-tree loading with background tasks. This also applies to time-consuming tasks such as importing or migrating. For example:
If an error occurs, a small red lightbulb appears in the lower-right corner indicating the number of errors.
Generate NgBatis Entity Classes
In the tree navigation, right-click a table object to generate a NgBatis entity class, as shown below:
Subscription and Licensing
To help sustain future development, we’ve removed the trial feature in favor of a subscription licensing model. Key points affected are:
- Offline users need to purchase a license key and then install it correctly.
- Online users can simply log in to access essential features.
- If you need AI support, data migration, or data backup, you must purchase a Professional Edition license.
- After subscribing, log in again to silently install the license key.
For user accounts that supported us before v2.0.0’s release, the system automatically grants at least one year of Professional Edition license as a gesture of thanks. After re-logging, check the software to see the license’s validity period. If you logged in before
v2.0.0but did not receive a license, please contact us.
Online Licensing
Just log in again.
Offline Licensing
On the device needing a license, open the client and click [Set License Key]. A license key window appears, shown below:
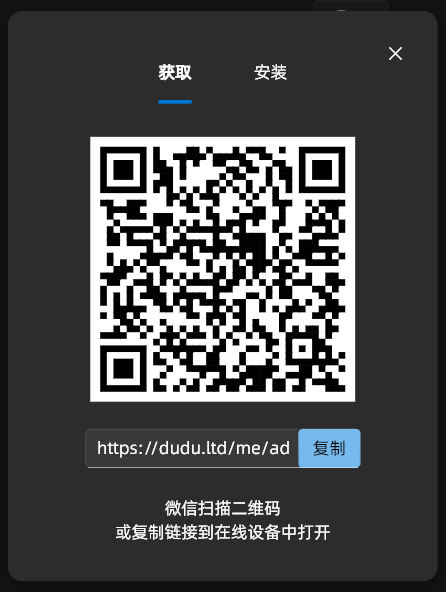
Use WeChat to scan the QR code and bind the device:
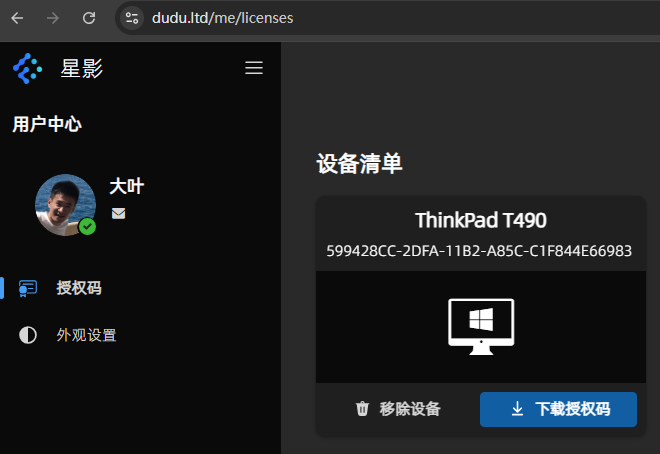
After binding, go to the device list and click [Download License Key]:
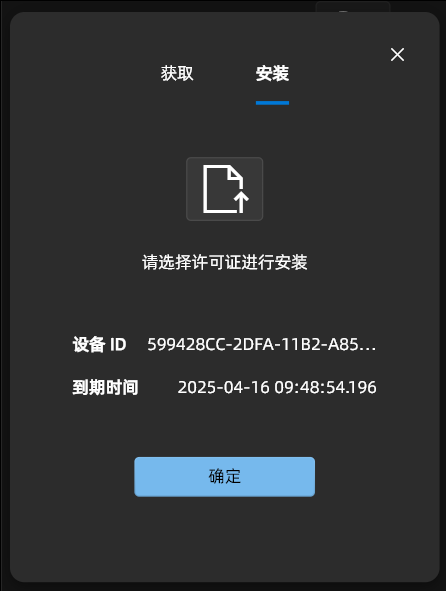
Once you have the license file, return to the client, switch to [Install], and click the icon to select a license file. Choose the downloaded file. If validation passes, licensing installation succeeds:
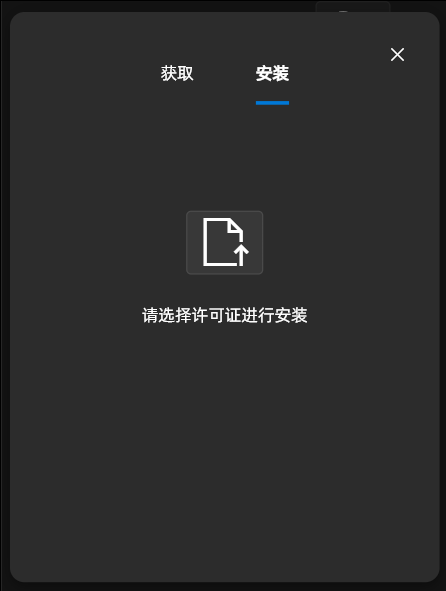
After installation, click [OK] to finish offline licensing and access the main interface:
Other Changes to Existing Features
Storage Host Information Entry Moved
Right-click the data source name in the navigation tree and select [Overview] to see the database’s Storage hosts:
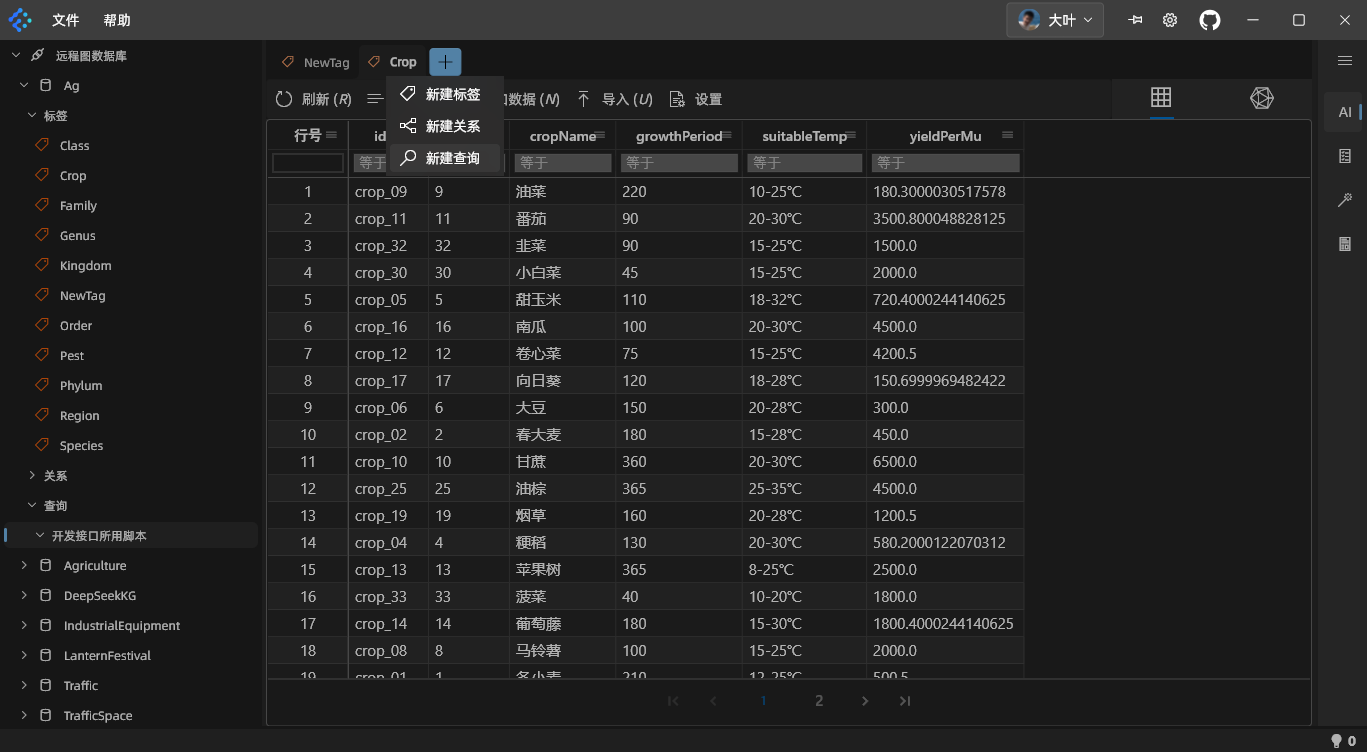
Interface Changes for Quickly Adding Queries, Tags, and Edges
In the top tab bar, click the [+] icon at the right end, then choose [New Query]. Enter the filename for your script and click [Save] to open a new script editing window: